Roller Integration
![]()
Connect NiceCheckIn with Roller - the all-in-one ticketing and venue management platform for attractions and leisure venues.
Overview
The Roller integration allows you to validate tickets and manage guest check-ins through NiceCheckIn terminals.
Prerequisites
- An active Roller account with API access
- API credentials (Client ID and Client Secret) from your Roller account
Setup
Request Integration Activation
Contact the NiceCheckIn team to activate the Roller integration for your account:
Email: support@nicecheckin.com
Generate API Credentials in Roller
Create API credentials in your Roller admin panel:
- Log in to Roller Management
- Navigate to Settings > Integrations > API Keys or go directly to manage.roller.app/api-keys
- Click Generate API Key
- Copy both the Client ID and Client Secret
Warning
The Client Secret is only shown once during generation. Make sure to copy it immediately. If you lose it, you will need to generate a new key.
Add API Key in NiceCheckIn
In the NiceCheckIn dashboard, click Manage API Keys on the Roller integration card, then click + Add.
Fill in the following fields:
- Name - A descriptive name (e.g., "Happy Heights Playground")
- Client ID - Paste the Client ID from Roller
- Client Secret - Paste the Client Secret from Roller
- URL - Select the environment:
Playground- For testingProduction- For live operations
Click Save.
You can add multiple API keys if you operate multiple venues. Each key connects to a separate Roller venue.
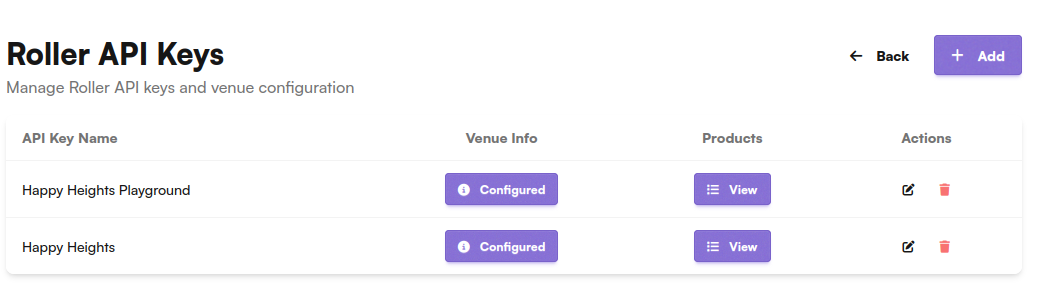
Verify Venue Configuration
After saving, a newly added API key shows the Venue Info status as Setup and Products as Import. Click Setup to fetch the venue details from the Roller API. Once the venue is successfully configured, the status changes to Configured.
Click on the Configured badge to view the venue details.
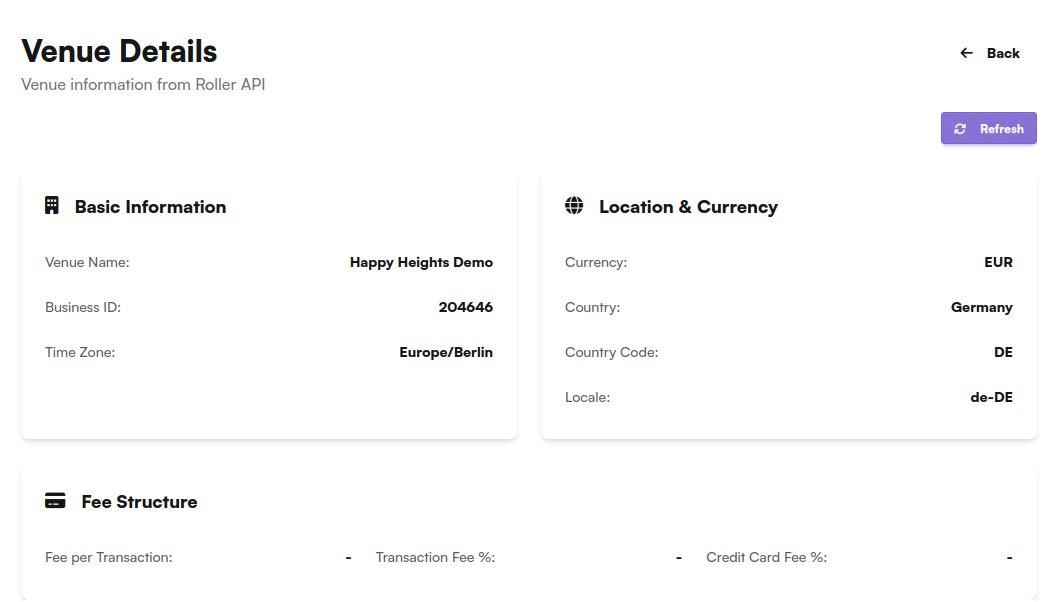
The venue details show:
- Basic Information - Venue Name, Business ID, Time Zone
- Location & Currency - Currency, Country, Country Code, Locale
- Fee Structure - Fee per Transaction, Transaction Fee %, Credit Card Fee %
Click Refresh to update the venue information from the Roller API.
Load Products
This section loads your Roller products into NiceCheckIn. Products must be loaded before you can assign them to checkers.
Click View in the Products column to see all products currently loaded from your Roller venue.

Products are grouped by type and show:
| Field | Description |
|---|---|
| ID | The Roller product ID |
| Name | Product name as configured in Roller |
| Price | Ticket price |
| Type | Product type (e.g., Pass) |
Keep products in sync
When you add or change products in Roller, click Reload Products to pull the latest products into NiceCheckIn. New products will not appear in checker configuration until they are loaded.
Create Checkers
Checkers define what products are allowed to enter under what conditions. Click Manage Checkers on the Roller integration card to see your existing checkers.
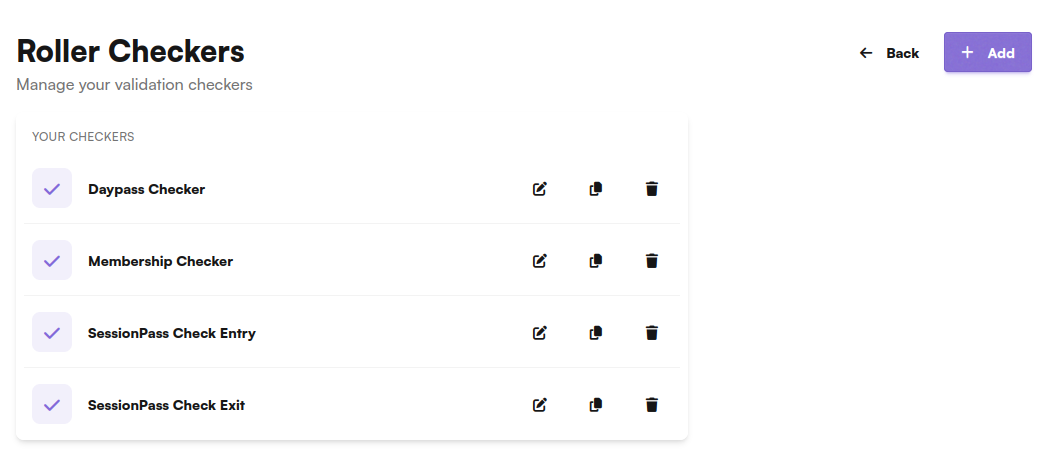
Click + Add to create a new checker.
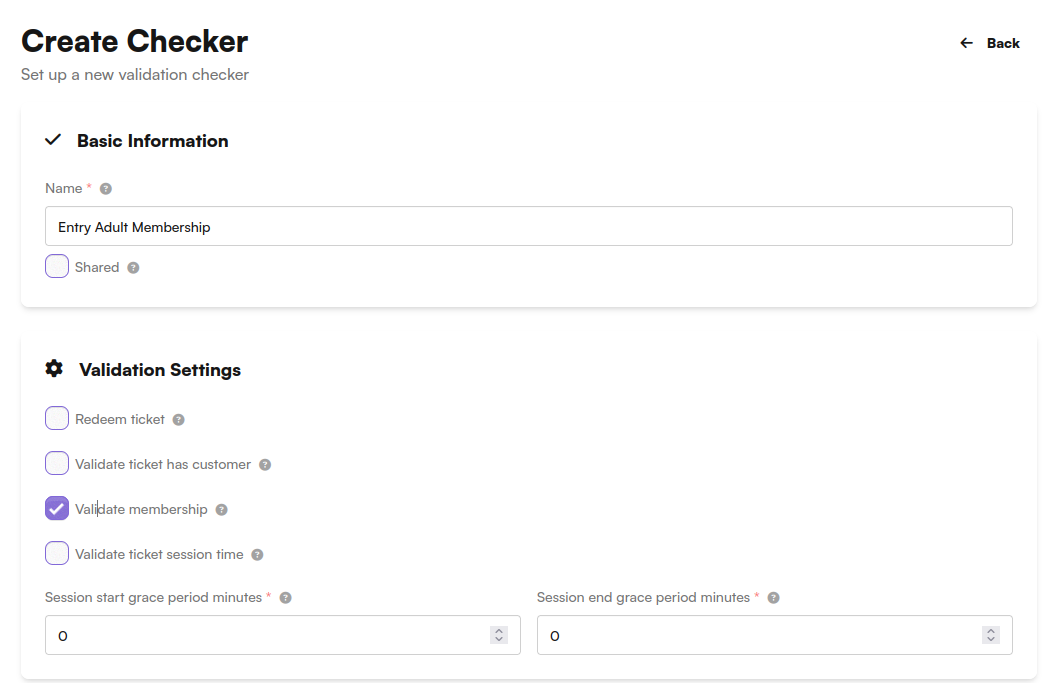
Basic Information
- Name - A descriptive name for the checker (e.g., "Daypass Checker", "Entry Adult Membership")
- Shared with Company Group - Enable if the checker should be shared across your company group
Validation Settings
- Redeem Ticket - Redeem the ticket upon scanning
- Validate Membership - Verify that the guest has an active membership
- Ticket has Customer - Check if the ticket is associated with a customer
- Validate Session Time - Check the ticket against session time windows
Membership or Session - not both
A checker can either validate membership or session time, not both at the same time. When one is selected, only products of the matching type (membership or session) can be assigned to the checker.
Session Grace Periods
When Validate Session Time is enabled, you can configure grace periods:
- Session Start Grace Period - Allow entry this many minutes before the session starts
- Session End Grace Period - Allow entry this many minutes after the session ends
This is useful to allow customers to arrive a few minutes early or to accommodate small overstays.
Customer Age Range
Optionally restrict entry based on customer age. Set to "No age restrictions" if not needed.
API Key
Select which Roller API key (venue) this checker is associated with.
Accepted Products
After creating the checker, you can assign which products are accepted. Click Edit in the Accepted Products section to select specific products.
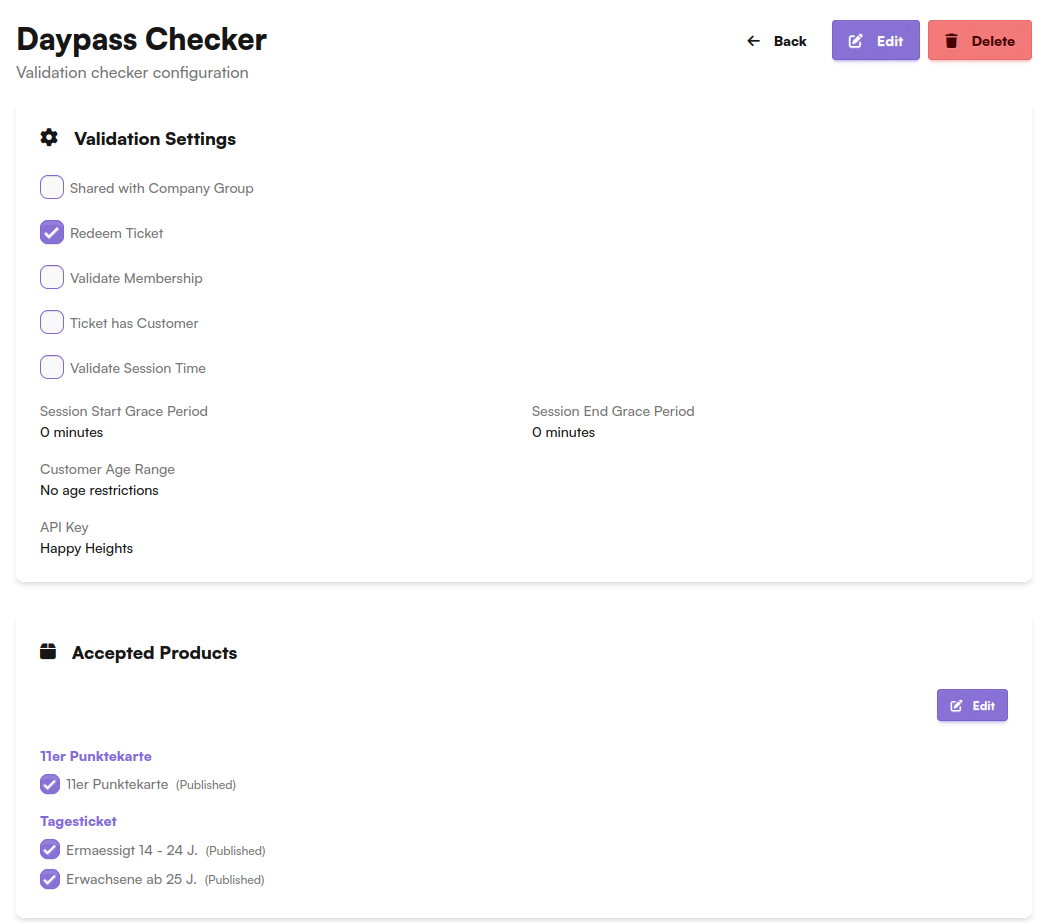
One product per checker
A single product should only be part of one checker. If you need different validation rules for different products, create separate checkers.
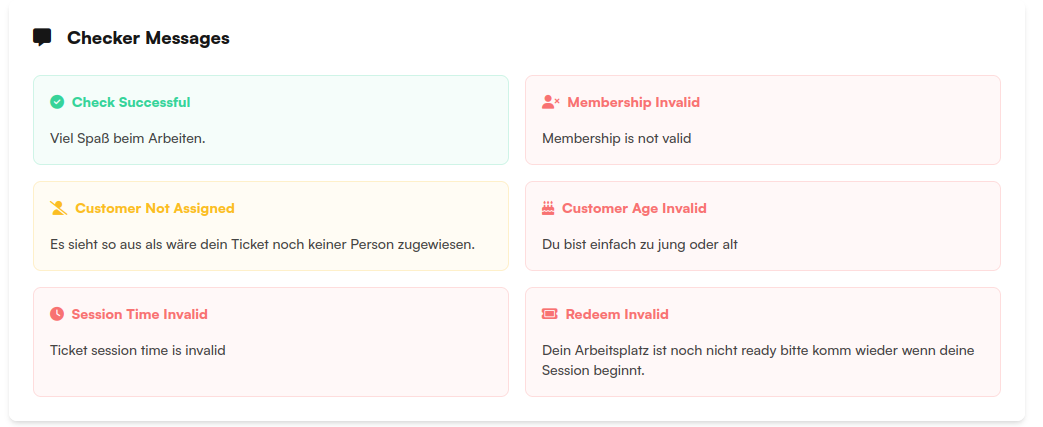
Checker Messages
Each checker allows you to define custom messages that are displayed on the scanning device depending on the validation result.
| Message | Shown when |
|---|---|
| Check Successful | Ticket is valid and check-in is confirmed |
| Membership Invalid | The membership on the ticket is not valid |
| Customer Not Assigned | The ticket is not assigned to a customer |
| Customer Age Invalid | The customer does not meet the age requirements |
| Session Time Invalid | The ticket session time does not match the current time |
| Redeem Invalid | The ticket could not be redeemed (e.g., already used) |
Assign Checkers to Devices
Multiple checkers can be assigned to a single scanning device. This allows one device to handle different ticket types with different validation rules.
The created checkers can be selected on your NiceCheckIn scanning devices. See Device Management for details on configuring devices.
Troubleshooting
Venue info shows as 'Not Configured'
Double-check your Client ID and Client Secret. Ensure you selected the correct URL environment (Playground vs. Production).
Products are not showing
Click Reload Products to re-sync from Roller. Ensure your Roller venue has active products configured.
Ticket scan is not being recognized
Verify the API key is correctly configured and the terminal has an active internet connection. Check that the correct validation settings are enabled on the checker and that the scanned product is in the checker's accepted products list.