Pipelines
Pipelines let you define what happens when one of your scanners reads a code. You build a pipeline once, then assign it to any number of scanners.
Navigate to Pipelines in the sidebar to see every pipeline configured for your company.
Concept
A pipeline sits between your integrations and your scanners. Integrations expose reusable building blocks (checkers, HTTP requests); a pipeline composes them into a sequence of steps; each scanner is assigned one or more pipelines and runs them when a code is read.
How integrations, pipelines, and devices relate.
Each pipeline is made of Steps, organised into three sections that always run in order:
1. Validate
The scanner checks the code against one or more of your integrations (Roller, USC, list-based, etc.). This section decides whether the code is legitimate. If every validate step passes, the pipeline moves on. If one fails, its on-failure setting decides whether to continue or abort.
2. Commit
Once the code is validated, commit steps record what happened, for example marking a ticket as redeemed or granting zone entry. These are the actions that actually change state at the venue or in an integration.
3. Notify
Notify steps send the outcome somewhere else, for example posting to an HTTP endpoint or a downstream system. They run last, and a failure here never blocks the scan.
Why this split matters
Keeping validate, commit, and notify separate makes one subtle but important guarantee: side effects that change the world (redeem a ticket, increment a zone) only happen once the code is known to be valid, and external notifications only happen once those side effects have succeeded.
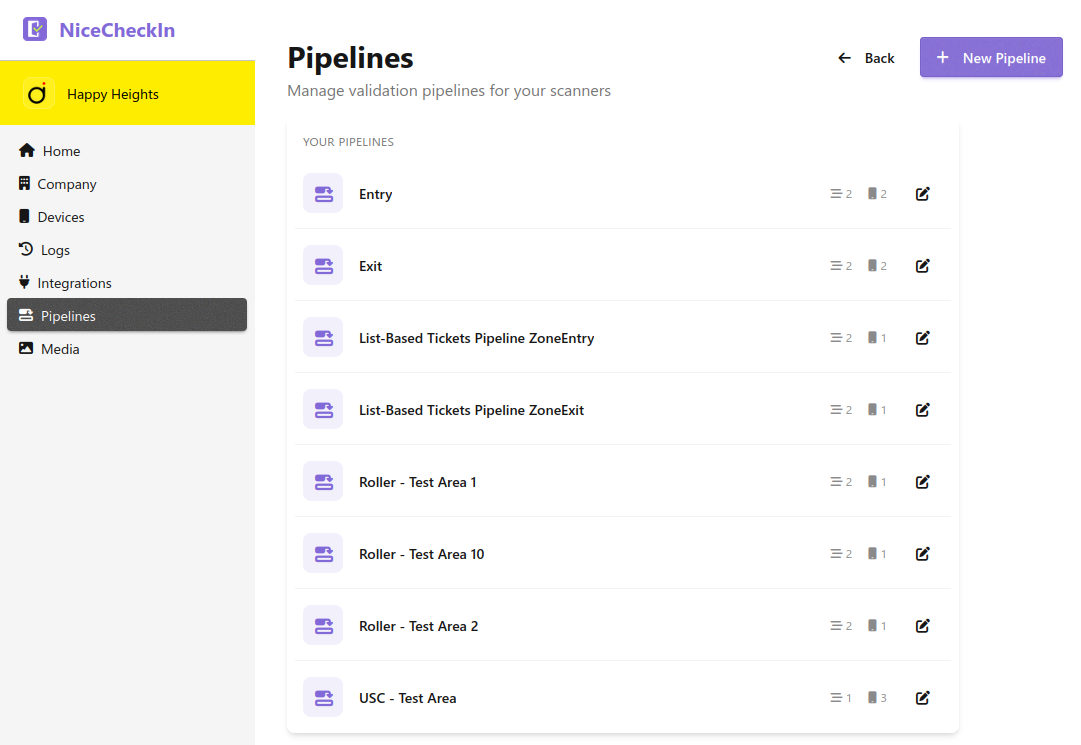
Pipeline List
On the Pipelines page every pipeline is shown together with two counters:
- Steps - how many steps the pipeline contains
- Devices - how many scanners it is assigned to
Click a pipeline to open its detail view.
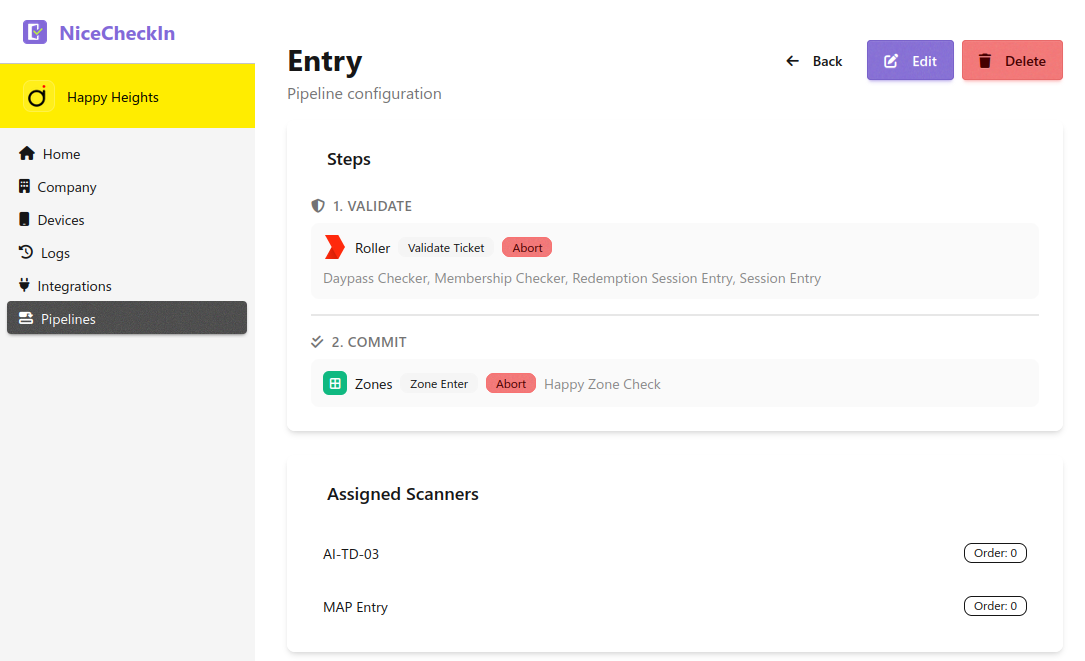
Steps are grouped by Validate / Commit / Notify, each showing:
- The integration icon and name (e.g., Roller, Zones, HTTP Request)
- The action badge (e.g.,
Validate Ticket,Zone Enter) - The on-failure badge (
AbortorContinue) for Validate and Commit steps - The checkers or requests the step runs against
Below the steps, the Assigned Scanners card lists every device the pipeline is assigned to, together with its order.
Building a Pipeline
From the Pipelines page choose + New Pipeline, give it a name, then add steps to the three sections using the + Add button in each section.
Add a Validate Step
In the Validate section, click + Add and pick a validator.
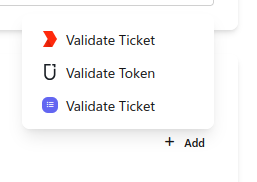
The menu lists one entry per integration that exposes validation (Roller, USC, list-based, etc.).
After adding a validator, select which Checkers it should run against. If an integration has no checkers yet, you'll see a prompt to go to Integrations and create one first.
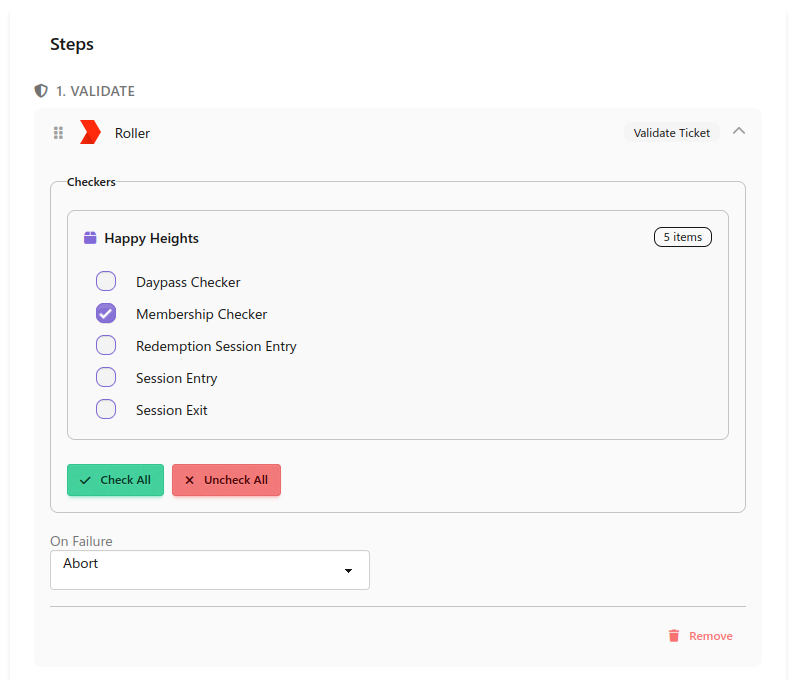
For each validate step, choose On Failure:
Abort- stop the pipeline and undo anything already committedContinue- keep going to the next step
Use Check All / Uncheck All to quickly toggle every checker in the step.
Add Commit Steps
In the Commit section, click + Add to pick what actually happens on a successful scan.
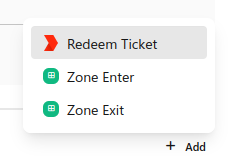
Typical commit steps:
- Redeem Ticket - Mark the ticket as used in the integration. Only tickets that passed through a checker with redemption enabled are actually redeemed here
- Zone Enter - Increment the occupancy of a zone using a Zone Checker
- Zone Exit - Decrement the occupancy of a zone
Commit steps show Fires for: and Skipped for: so you can see at a glance which checkers the step will act on.
Put redemption last
In most setups, Redeem Ticket should be the last commit step. Redemption cannot be undone, so if a later step (for example a zone enter) fails with Abort, a ticket that already redeemed cannot be returned to its unredeemed state. Putting redemption last keeps it as the final, irreversible action.
As with validate steps, each commit step has an On Failure setting (Abort or Continue).
Add Notify Steps
In the Notify section, click + Add to send the outcome somewhere else. The most common choice is HTTP Request, which has the scanner fire one or more HTTP Requests, for example to enable an attraction locally or on a remote server.
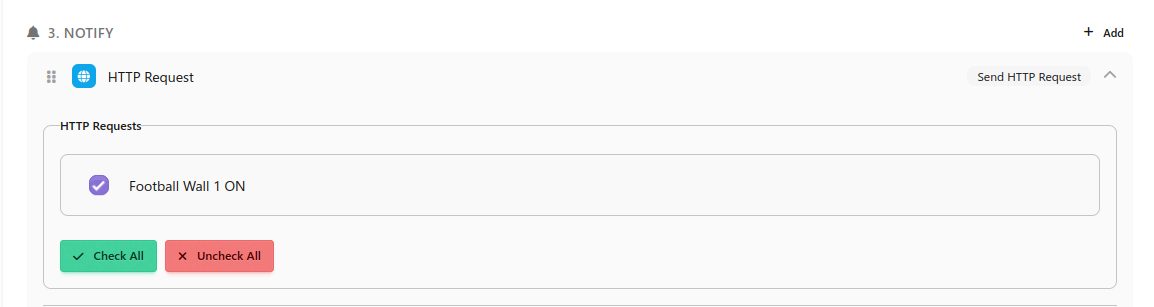
Tick each HTTP request the step should send. Notify steps always continue on failure - a dead endpoint never blocks a scan.
Reorder and Remove Steps
- Drag and drop steps by the handle on the left to reorder them within a section
- Click Remove at the bottom of a step to delete it
The editor also surfaces helpful hints. For example, if a checker has redemption enabled but you haven't added a Redeem Ticket step, you'll see a suggestion to add one.
Assigning Pipelines to Scanners
A pipeline does nothing until it is assigned to a scanner. On the pipeline detail page, the Assigned Scanners card lists every device the pipeline runs on, each with an Order value.
A single scanner can have more than one pipeline assigned, but only one per validation type (one Roller pipeline, one USC pipeline, and so on). When a code is scanned, the scanner tries pipelines in order (lowest first) until one recognises the code. This lets one scanner accept, say, both Roller tickets and USC memberships by having two pipelines assigned to it:
| Order | Pipeline | Recognises |
|---|---|---|
0 |
Entry (Roller) | Roller ticket codes |
1 |
Entry (USC) | USC member codes |
Assign or unassign pipelines from the scanner detail page in Devices.
Example: Zone Entry for Memberships
A full pipeline for a gated membership area could look like:
- Validate - Roller (checkers: Membership Checker, Daypass Checker), on failure:
Abort - Commit - Zone Enter (Happy Zone Check), on failure:
Abort - Commit - Redeem Ticket (only fires for checkers with redemption enabled, in this case daypasses), on failure:
Abort - Notify - HTTP Request (Football Wall 1 ON)
A scan of a valid membership is recognised, the visitor is counted into the zone, no redemption happens (memberships aren't redeemed), and the attraction is switched on locally. If the zone is full, the pipeline aborts at step 2, the ticket is not redeemed, and the attraction is not switched on.