Zones
Manage physical areas with a maximum capacity and track who is currently inside. Zones are combined with your existing integrations (Roller, Urban Sports Club, list-based) to control entry and exit, and to prevent the same ticket or member being used to enter twice in a row.
Overview
A Zone represents an area with a defined maximum capacity. On top of each zone you can define Zone Checkers that act as entry or exit steps in a Pipeline. Each time a code is scanned at a zone entry, the occupancy goes up; at a zone exit, it goes down.
Zones are most useful when your ticket type allows multiple entries per day, such as:
- Memberships (e.g., a monthly or annual membership)
- Day passes that are not redeemed on first use
For these ticket types, redemption alone cannot prevent abuse. By tracking zone presence, NiceCheckIn makes sure the same ticket or member ID has to leave the zone before it can be used to enter again.
Navigate to Integrations in the sidebar and open Manage Zones on the Zones integration card.
Manage Zones
The Zones list shows every zone in your venue together with its current occupancy.

Each zone card shows:
- Name - The zone identifier shown to staff and in the widget
- Occupancy - Current count vs. maximum capacity (e.g.,
0 / 220) - Reset - Set the occupancy back to
0. Useful at the start of a new day or after a one-off event - Edit - Change the zone name or capacity
- Delete - Remove the zone. Any pipeline step referencing it must be updated
Add a Zone
Click + Add to create a new zone.
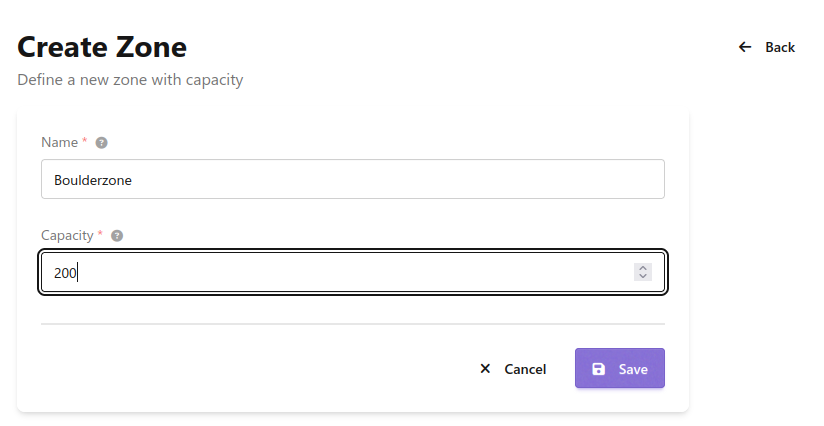
- Name - A descriptive name (e.g., "Boulderzone", "Main Hall")
- Capacity - The maximum number of people allowed inside at the same time
Click Save. The new zone starts at 0 occupancy.
Zone Checkers
A Zone Checker defines how a scanned code is identified when it enters or leaves a zone. One checker can be used both in an entry step and in an exit step of your pipelines.
Open Manage Zone Checkers from the Zones integration card.
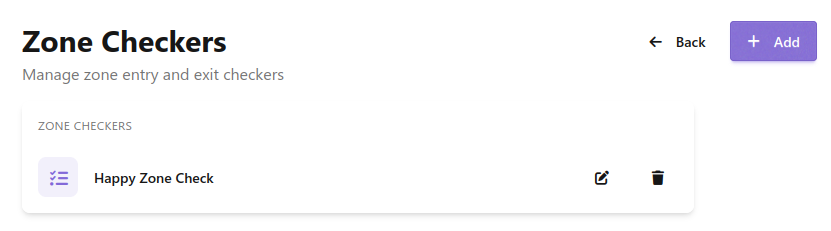
Click + Add to create a new checker, or the edit icon on an existing checker to update it.
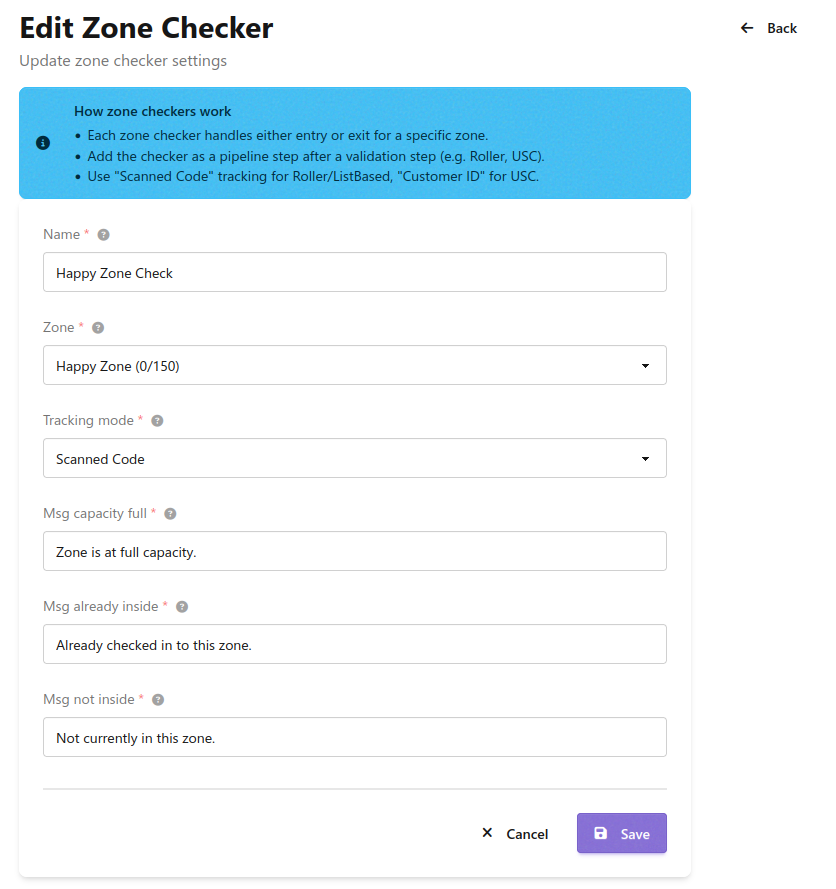
How zone checkers work
- Each zone checker step handles either entry or exit for a specific zone.
- Add the checker as a pipeline step after a validation step (e.g., Roller, USC).
- Use Scanned Code tracking for Roller / list-based tickets, Customer ID for Urban Sports Club.
Configure the checker:
- Name - A descriptive name (e.g., "Happy Zone Check")
- Zone - The zone this checker operates on. The dropdown shows the current occupancy (e.g.,
Happy Zone (0/150)) - Tracking mode - How an individual is identified inside the zone:
Scanned Code- Tracks the raw scanned code. Use for Roller and list-based tickets, where each ticket ID is uniqueCustomer ID- Tracks by customer identifier. Use for Urban Sports Club, so a member is counted once regardless of the code on their device
- Msg capacity full - Shown on the device when the zone is at full capacity and entry is refused
- Msg already inside - Shown on an entry scan when the code or customer is already counted as inside
- Msg not inside - Shown on an exit scan when the code or customer is not currently counted as inside
Click Save.
Using a Zone Checker in a Pipeline
A zone checker only takes effect once it is used inside a pipeline. In the pipeline editor, add a Zone Enter or Zone Exit step to the Commit section and pick the zone checker to run.
Because Zone Enter and Zone Exit are separate step types, a single checker definition can back both the entry and the exit step for a zone, and the messages above cover both directions.
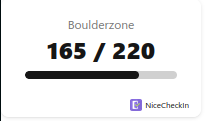
Occupancy Widget
Each zone ships with a ready-made widget you can embed on any website to show its live occupancy.
On the zone detail page, expand Embed Widget.
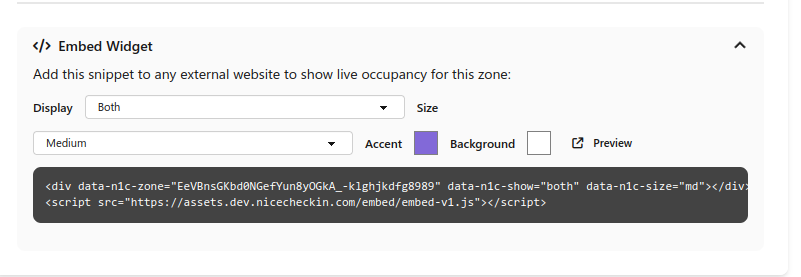
Choose how the widget looks:
- Display -
Absolute(e.g.,165 / 220),Percentage(e.g.,75%), orBoth - Size -
Small,Medium, orLarge - Accent - Color of the progress bar
- Background - Background color of the widget
Click Preview to open a preview of the current configuration.
Copy the generated snippet and paste it into any HTML page. The widget reads live occupancy from NiceCheckIn and updates automatically:
<div data-n1c-zone="..." data-n1c-show="both" data-n1c-size="md"></div>
<script src="https://assets.nicecheckin.com/embed/embed-v1.js"></script>
Tip
The widget is public and does not require authentication. Only the current count and capacity are exposed, never the identifiers of individual visitors.