Smeetz Integration

Connect NiceCheckIn with Smeetz, the ticketing and booking platform for leisure attractions.
Overview
The Smeetz integration checks Smeetz tickets on your NiceCheckIn scanners. A checker tests each scanned ticket against a Smeetz access control area. A pipeline then records the entry in Smeetz.
Prerequisites
- An active Smeetz account with access control
- Your Smeetz group ID and API key
Setup
1. Request Integration Activation
Contact the NiceCheckIn team to activate the Smeetz integration for your account:
Email: support@nicecheckin.com
2. Find the Group ID in Smeetz
Click your account at the top right in Smeetz. The menu shows the group ID below your group name.
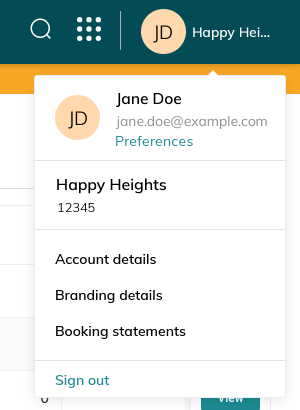
In this example, the group name is Happy Heights and the group ID is 12345.
3. Copy the API Key in Smeetz
- Click at the top right in Smeetz
- Select Integrations
- Copy the key from the API-Key section
4. Set Up Areas in Smeetz
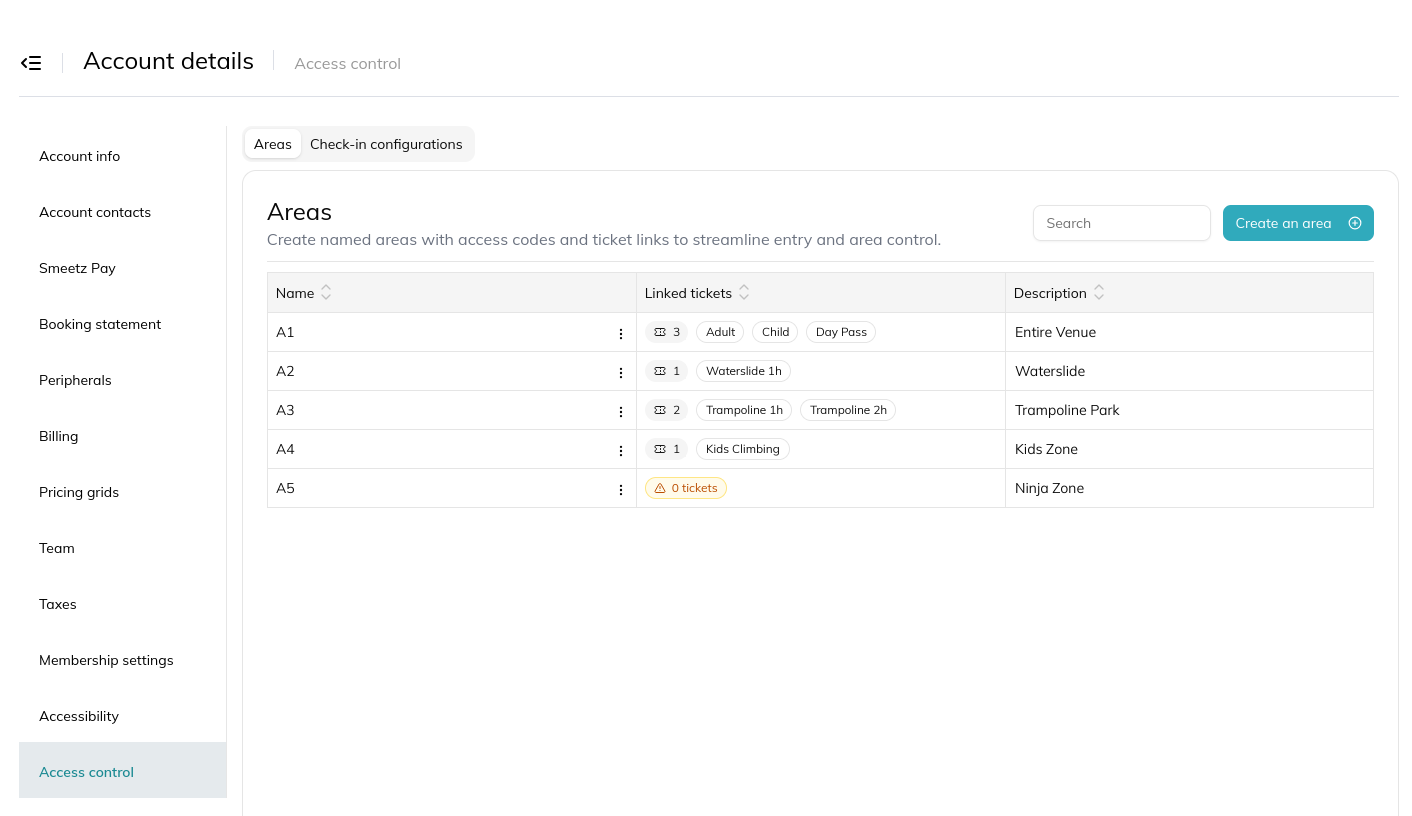
Smeetz controls access with areas. Each area links the tickets that grant access to it. A NiceCheckIn checker tests scanned tickets against one area.
To manage areas, click your account at the top right in Smeetz and select Account details > Access control.
Help with areas
Contact Smeetz support for help with setting up areas and linking tickets.
5. Add the API Key in NiceCheckIn
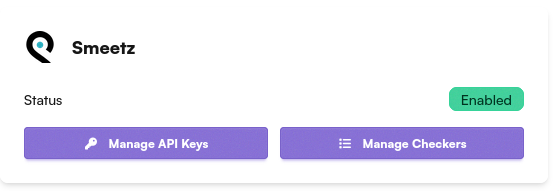
In the NiceCheckIn dashboard, click Manage API Keys on the Smeetz integration card.
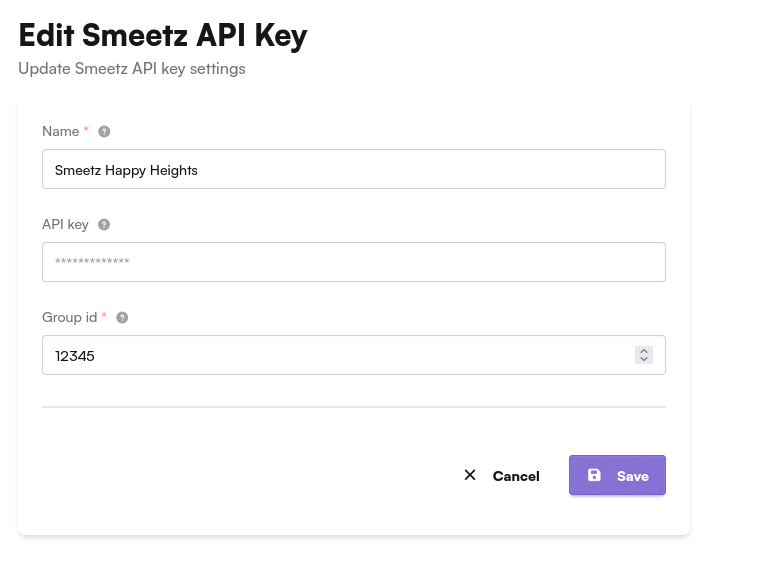
Click + Add and fill in the following fields:
- Name - A descriptive name (e.g., "Smeetz Happy Heights")
- API key - Paste the API key from Smeetz
- Group id - Enter the group ID from Smeetz
Click Save.
The list shows all your Smeetz API keys:
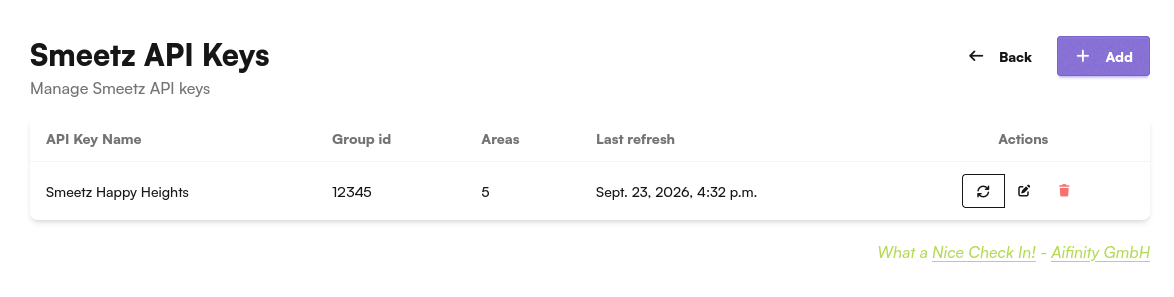
| Column | Description |
|---|---|
| API Key Name | The name you entered |
| Group id | The Smeetz group ID |
| Areas | Number of areas loaded from Smeetz |
| Last refresh | Time of the last area sync |
You can add multiple API keys, for example one per Smeetz account.
6. Sync Areas
Click in the Actions column to load the areas from Smeetz. Areas and Last refresh update after the sync.
Sync after changes in Smeetz
Click again whenever you create or rename areas in Smeetz. New or renamed areas appear in checkers only after a sync.
7. Create a Checker
A checker decides which area a scanned ticket must have access to. Click Manage Checkers on the Smeetz integration card to see your checkers.
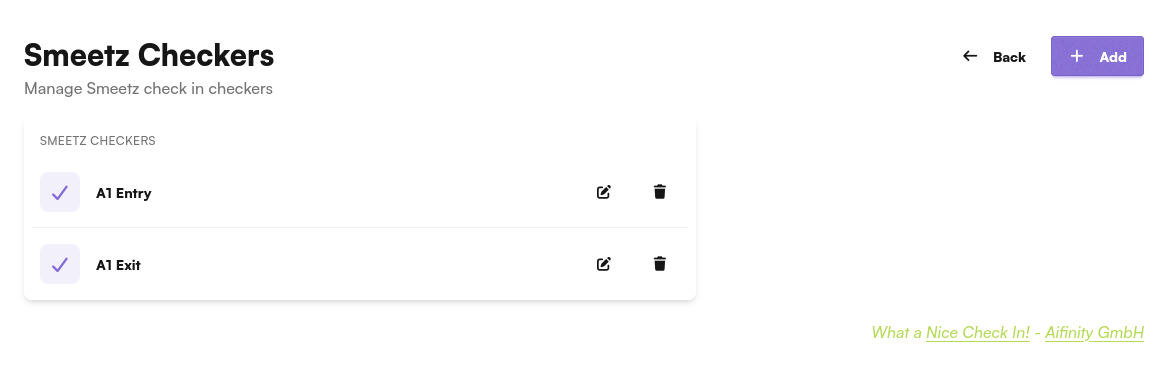
Click + Add to create a new checker.
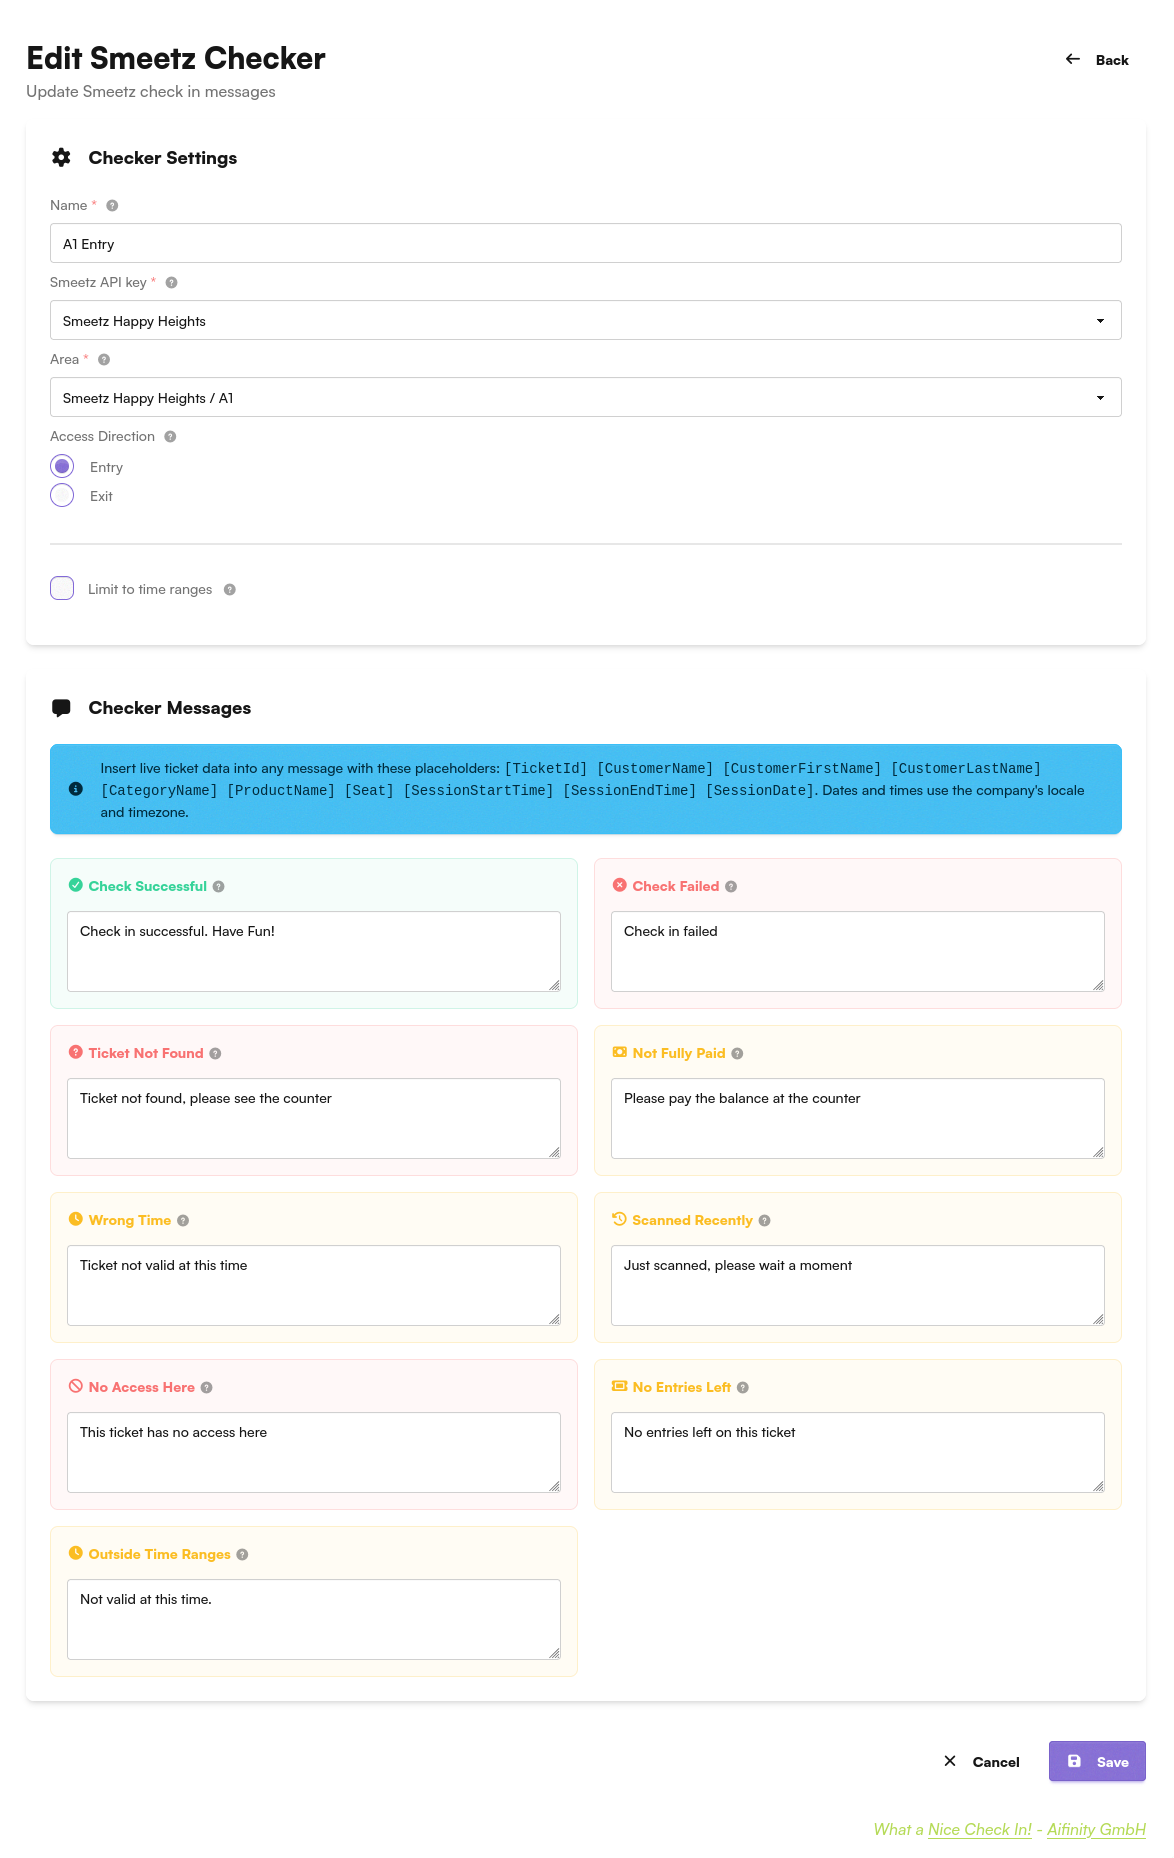
Configure the checker:
- Name - A descriptive name (e.g., "A1 Entry")
- Smeetz API key - Select the API key of your Smeetz account
- Area - Select the Smeetz area the ticket must have access to
- Access Direction - Choose the direction:
Entry- For check-in at the entranceExit- For check-out at the exit
You can create multiple checkers for the same area, for example one for entry and one for exit.
Set the optional time ranges and the checker messages below, then click Save.
Limit to Time Ranges
Enable Limit to time ranges to set when the checker grants entry on each day of the week. Outside these ranges, the checker grants no entry. Leave it off to let the checker grant entry at all times.
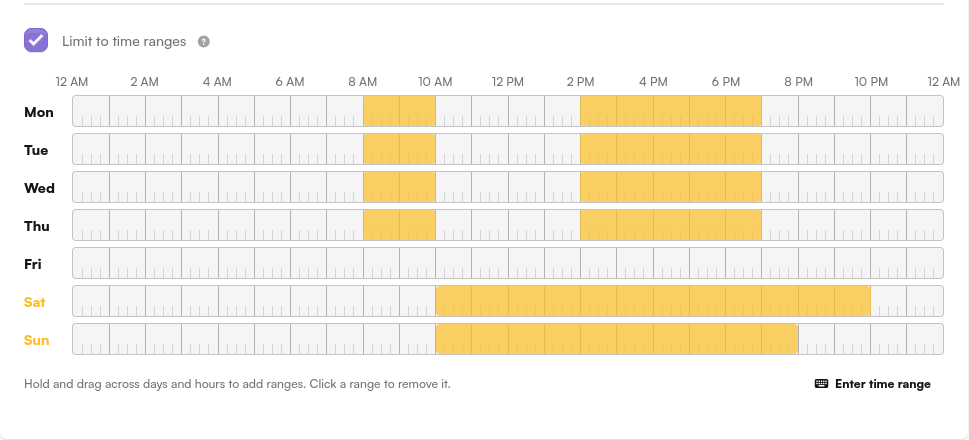
- Add a range - Hold and drag across days and hours
- Remove a range - Click the range
Days without a range are blocked all day. In the example above, the checker grants entry at these times:
- Monday to Thursday - 8 AM to 10 AM and 2 PM to 7 PM
- Friday - No entry
- Saturday - 10 AM to 10 PM
- Sunday - 10 AM to 8 PM
Checker Messages
Each checker defines the messages the scanner shows for each result.
| Message | Shown when |
|---|---|
| Check Successful | The ticket is valid and the guest may enter |
| Check Failed | The check failed for another reason |
| Ticket Not Found | Smeetz does not know the scanned code |
| Not Fully Paid | The booking is not fully paid |
| Wrong Time | The ticket is not valid at this time |
| Scanned Recently | The ticket was scanned a moment ago |
| No Access Here | The ticket has no access to the checker's area |
| No Entries Left | The ticket has no entries left |
| Outside Time Ranges | The scan is outside the checker's time ranges |
Insert live ticket data into any message with these placeholders:
[TicketId] [CustomerName] [CustomerFirstName] [CustomerLastName] [CategoryName] [ProductName] [Seat] [SessionStartTime] [SessionEndTime] [SessionDate]
Dates and times use your company's locale and time zone.
8. Create a Pipeline
A pipeline defines what happens when a scanner reads a Smeetz ticket. Go to Pipelines in the sidebar, click + New Pipeline and enter a Name.
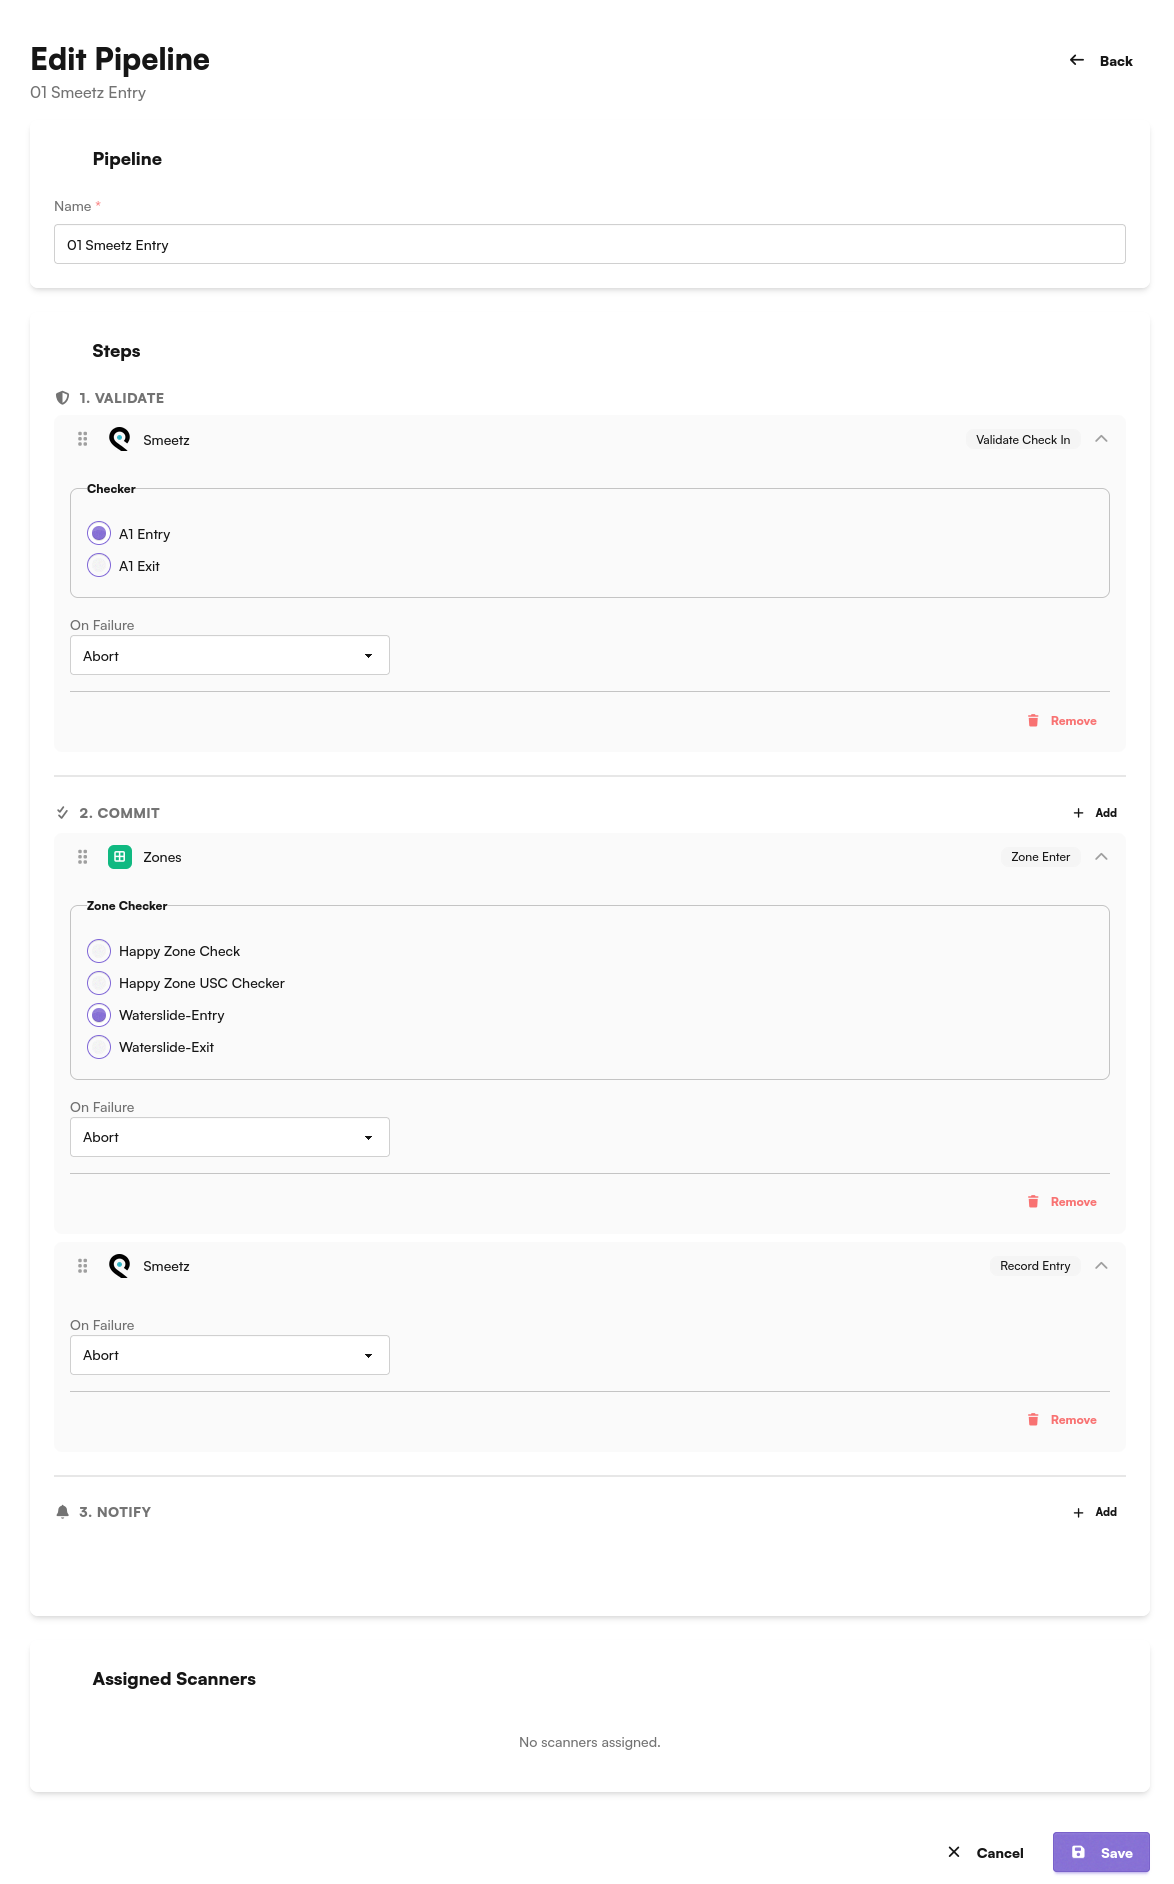
Add these steps:
- Validate - Click + Add, select Smeetz with the action Validate Check In and pick your checker (e.g., "A1 Entry"). Set On Failure to
Abort - Commit - Click + Add and select Smeetz with the action Record Entry. This step records the entry in Smeetz. Set On Failure to
Abort
Optionally add more commit steps before Record Entry. The example above first counts the guest into a zone with Zone Enter.
Put Record Entry last
Keep Record Entry as the last commit step. Then a failing step before it, for example a full zone, aborts the scan before Smeetz records the entry. See Put redemption last.
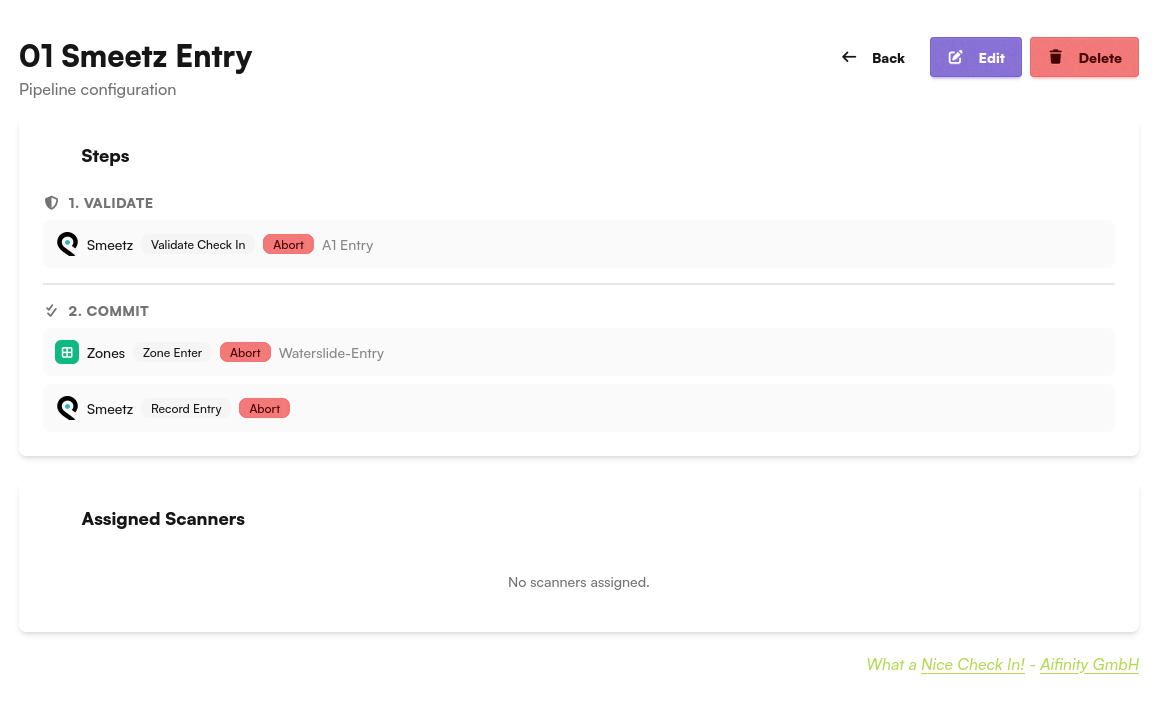
Click Save. The pipeline detail page shows all steps:
9. Assign the Pipeline to a Device
A pipeline does nothing until it runs on a scanner. Open the device in Devices, click Edit and check the pipeline. See Device Management for details.
The device then appears under Assigned Scanners on the pipeline detail page.
Check-In Flow
- The guest scans a Smeetz ticket at the scanner
- The checker asks Smeetz whether the ticket has access to its area
- On success, NiceCheckIn records the entry in Smeetz
- The scanner shows the matching checker message and opens the gate if one is connected
Troubleshooting
Integration is not available in the dashboard
The NiceCheckIn team must activate the integration. Contact support@nicecheckin.com.
Area is missing in the checker
Click on the API key to sync the areas. Check that the area exists in Smeetz under Account details > Access control.
Areas do not load
Check the API key and the group ID. Both must belong to the same Smeetz account.
Scanner shows the No Access Here message
The ticket is not linked to the checker's area. Link the ticket to the area in Smeetz. Contact Smeetz support for help.
Scanner does not react to Smeetz tickets
Check that a Smeetz pipeline is assigned to the device and that its validate step uses the right checker.