EGYM Wellpass Integration
Connect NiceCheckIn with EGYM Wellpass, the corporate fitness and wellbeing membership.
Overview
The EGYM Wellpass integration checks Wellpass members in on your NiceCheckIn scanners. Members show the Verification-TAN QR code from the Wellpass app at the scanner. A checker sends the code to EGYM Wellpass, which checks the membership for your venue.
Prerequisites
- Your venue is an EGYM Wellpass partner
- An EGYM Wellpass API key for each location
Setup
1. Request Integration Activation
Contact the NiceCheckIn team to activate the EGYM Wellpass integration for your account:
Email: support@nicecheckin.com
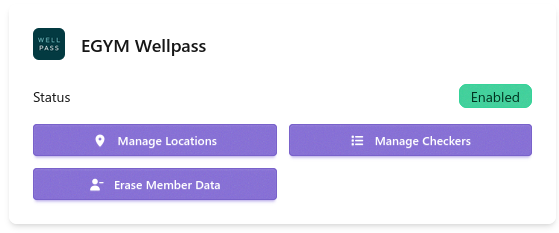
Once activated, the EGYM Wellpass card appears under Integrations.
2. Add a Location
A location links NiceCheckIn to your venue at EGYM Wellpass. Click Manage Locations on the EGYM Wellpass integration card to see your locations.
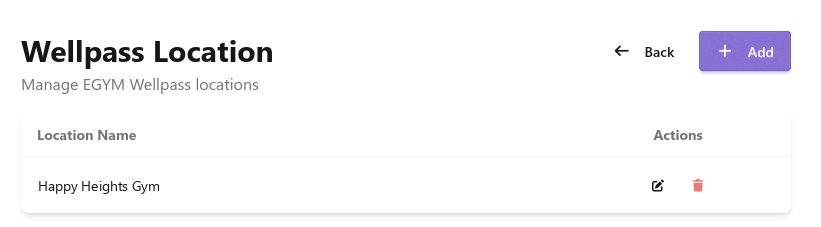
Click + Add and fill in the following fields:
- Name - A descriptive name (e.g., "Happy Heights Gym")
- API key - Paste the API key of this location from EGYM Wellpass
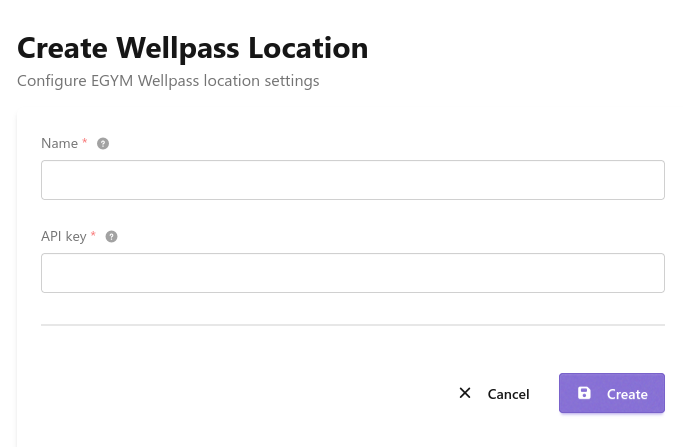
Click Create.
You can add multiple locations, for example one per venue.
3. Create a Checker
A checker defines which location checks the scanned code and which messages the scanner shows. Click Manage Checkers on the EGYM Wellpass integration card, then click + Add.
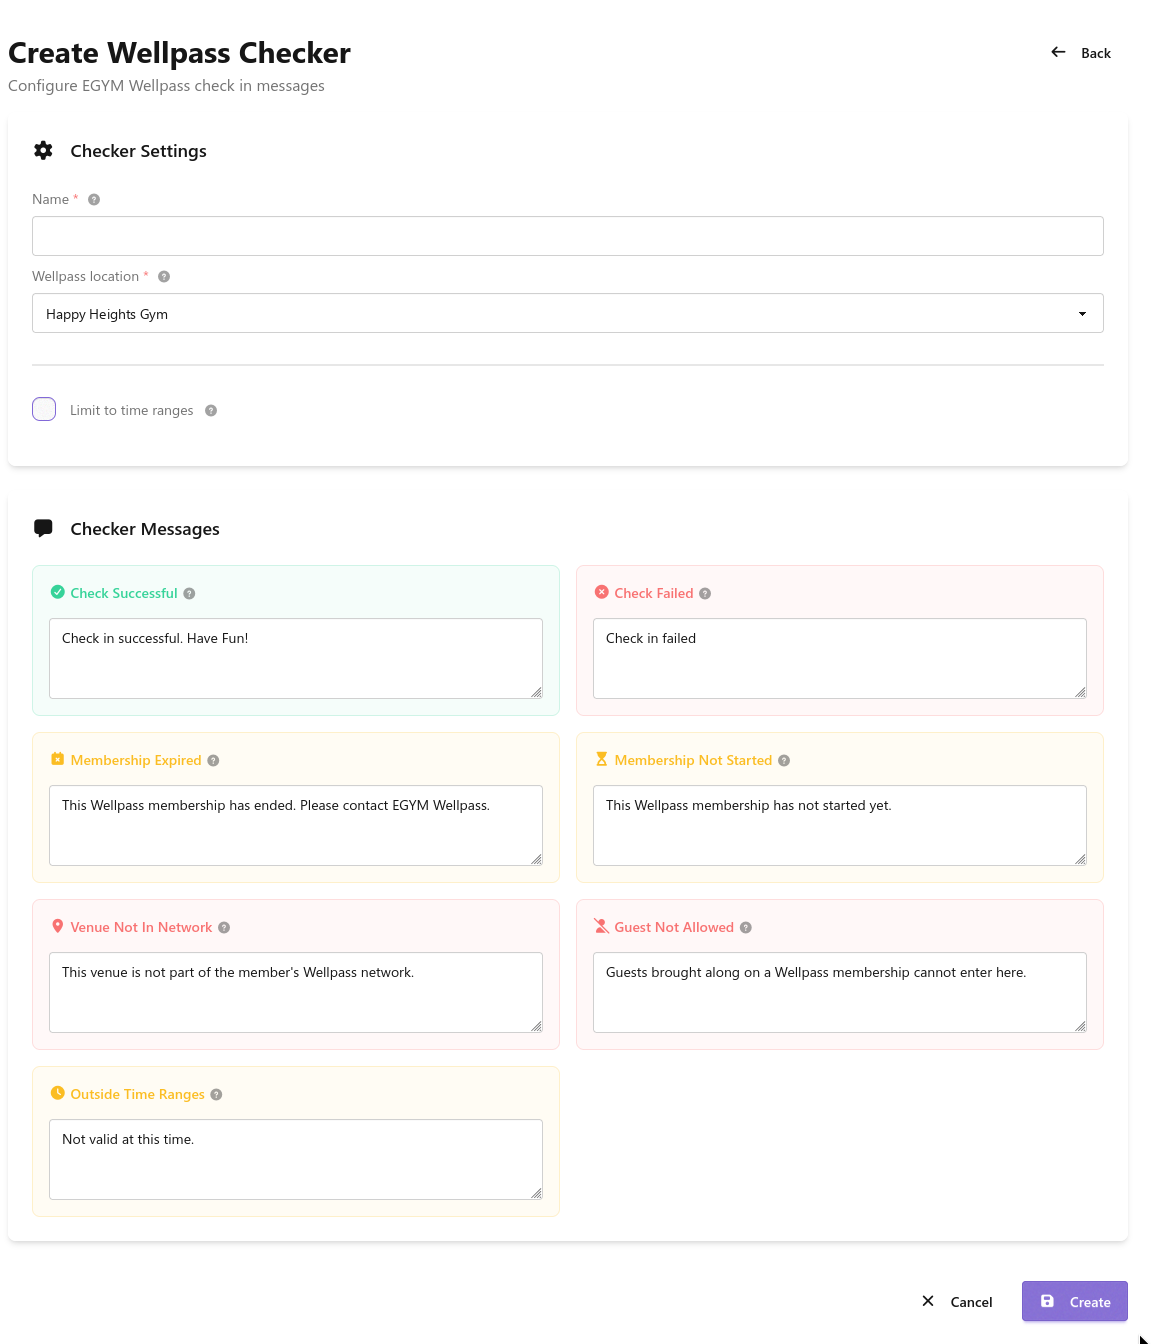
Configure the checker:
- Name - A descriptive name (e.g., "Wellpass Entry")
- Wellpass location - Select your location (e.g., "Happy Heights Gym")
Set the optional time ranges and the checker messages below, then click Create.
Limit to Time Ranges
Enable Limit to time ranges to set when the checker grants entry on each day of the week. Outside these ranges, the checker grants no entry. Leave it off to let the checker grant entry at all times.
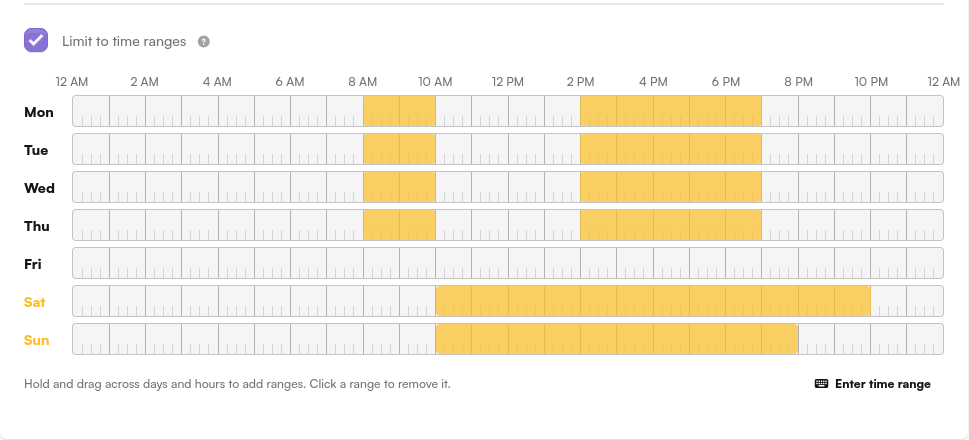
- Add a range - Hold and drag across days and hours
- Remove a range - Click the range
Days without a range are blocked all day. In the example above, the checker grants entry at these times:
- Monday to Thursday - 8 AM to 10 AM and 2 PM to 7 PM
- Friday - No entry
- Saturday - 10 AM to 10 PM
- Sunday - 10 AM to 8 PM
Checker Messages
Each checker defines the messages the scanner shows for each result.
| Message | Shown when |
|---|---|
| Check Successful | The membership is valid and the member may enter |
| Check Failed | The check failed for another reason |
| Membership Expired | The Wellpass membership has ended |
| Membership Not Started | The Wellpass membership has not started yet |
| Venue Not In Network | Your venue is not part of the member's Wellpass network |
| Guest Not Allowed | The code belongs to a guest brought along on a membership, and your venue does not admit them |
| Outside Time Ranges | The scan is outside the checker's time ranges |
4. Create a Pipeline
Like all other integrations, a Wellpass checker runs as a validate step in a pipeline. Go to Pipelines in the sidebar, click + New Pipeline and enter a Name.
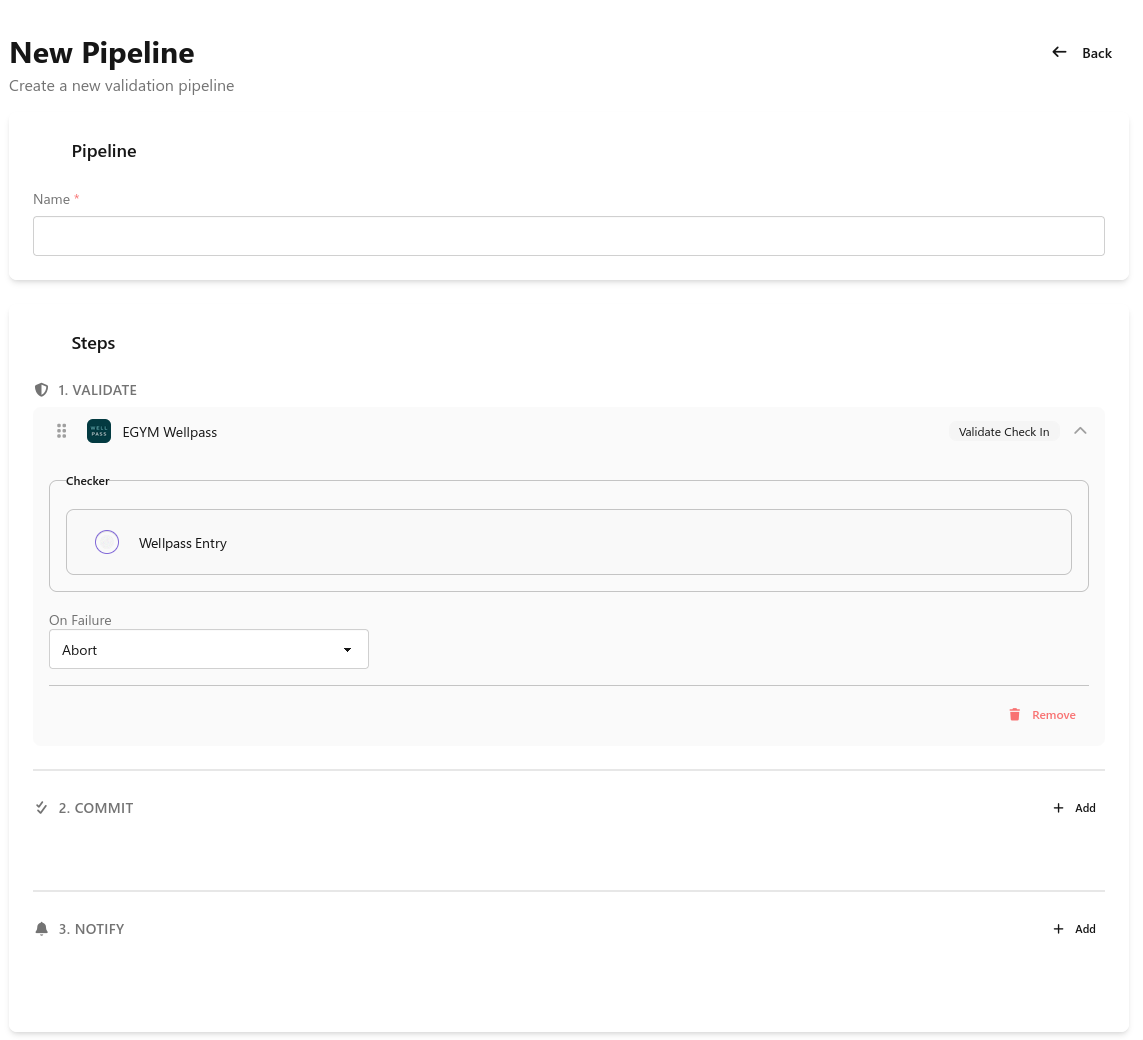
In the Validate section, click + Add, select EGYM Wellpass with the action Validate Check In and pick your checker (e.g., "Wellpass Entry"). Set On Failure to Abort.
EGYM Wellpass needs no commit step. You can still add commit and notify steps, as in any other pipeline.
Click Save.
5. Assign the Pipeline to a Device
A pipeline does nothing until it runs on a scanner. Open the device in Devices, click Edit and check the pipeline. See Device Management for details.
The device then appears under Assigned Scanners on the pipeline detail page.
Check-In Flow
- The member shows the Verification-TAN QR code from the Wellpass app at the scanner. See the check-in guide for members
- The checker sends the code to EGYM Wellpass
- EGYM Wellpass checks the membership for your venue
- The scanner shows the matching checker message and opens the gate if one is connected
On the first check-in, EGYM Wellpass registers the member at your venue.
Erase Member Data
Use this when a member asks you to delete their data. Click Erase Member Data on the EGYM Wellpass integration card.
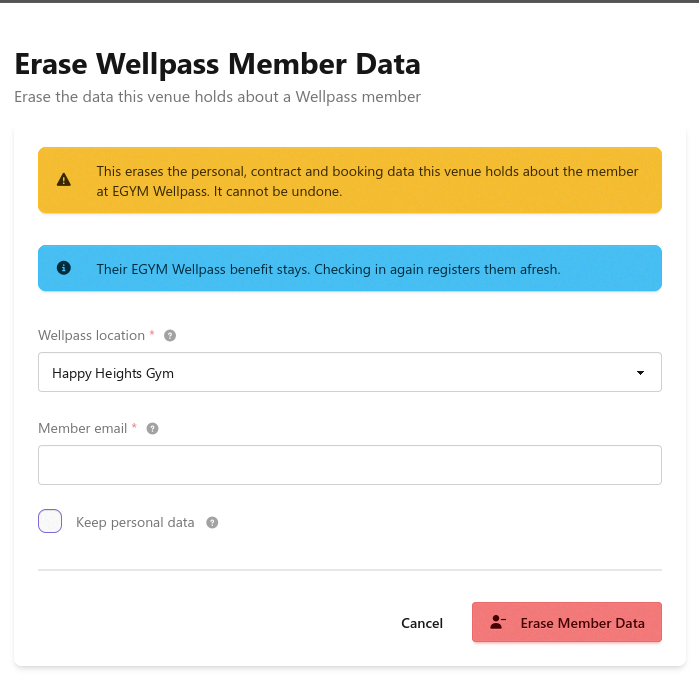
Fill in the following fields:
- Wellpass location - Select the location the member checked in at
- Member email - Enter the email the member uses at EGYM Wellpass
- Keep personal data - Tick to remove only the membership data and keep the personal data
Click Erase Member Data.
Without Keep personal data, NiceCheckIn erases the personal, contract and booking data your venue holds about the member at EGYM Wellpass.
Cannot be undone
Erased data cannot be restored.
The member keeps their EGYM Wellpass benefit. The next check-in registers them at your venue again.
Troubleshooting
Integration is not available in the dashboard
The NiceCheckIn team must activate the integration. Contact support@nicecheckin.com.
Location is missing in the checker
Add the location under Manage Locations first. See Add a Location.
Scanner does not react to the Wellpass QR code
Check that a Wellpass pipeline is assigned to the device and that its validate step uses the right checker.
Check-in fails for a member
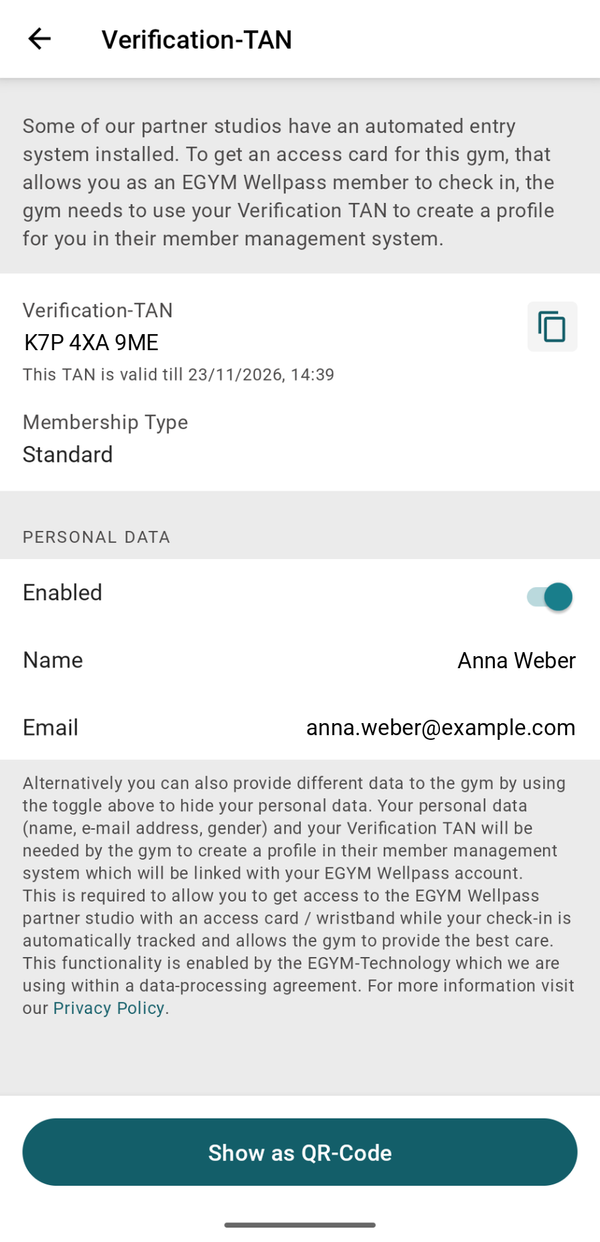
Ask the member to turn on Personal Data on the Verification-TAN screen and show the QR code again. See the check-in guide for members.
Scanner shows the Venue Not In Network message
The member's Wellpass plan does not include your venue. The member must contact EGYM Wellpass.
Check-In Guide for Members
Check-in on NiceCheckIn scanners differs from the usual check-in in the Wellpass app. Members show their Verification-TAN QR code at the scanner. Share these steps with your members.
Every entry
Members show the Verification-TAN QR code at every entry, not only on their first visit.
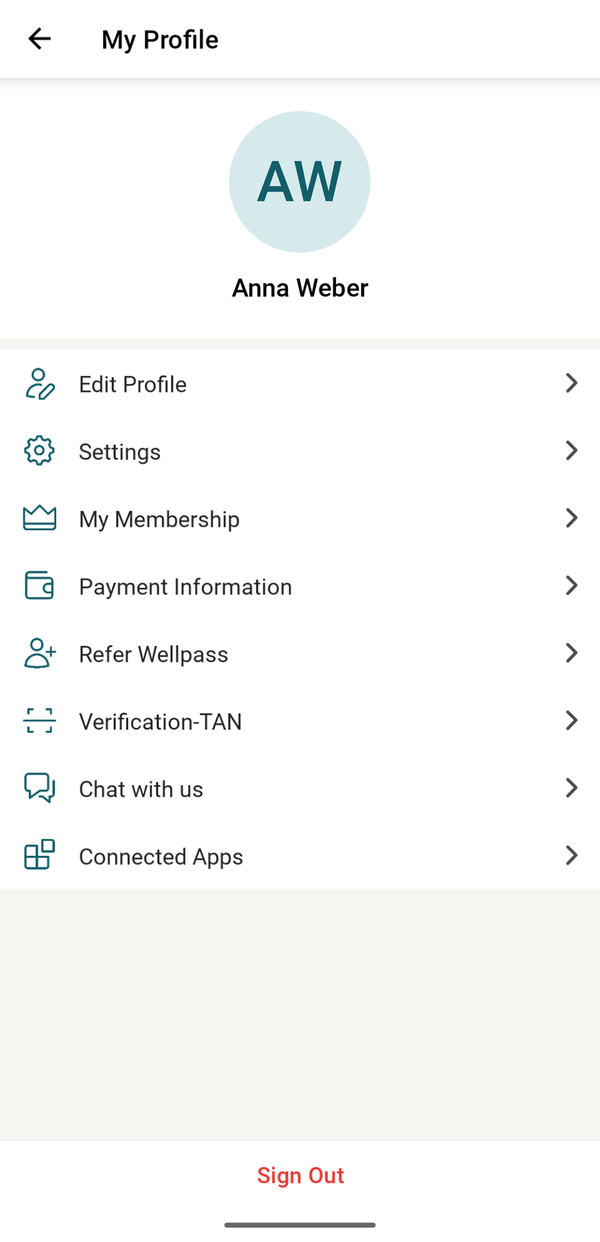
- Open the EGYM Wellpass app
- Tap your profile at the top right
-
Tap Verification-TAN
-
Turn on Enabled under Personal Data
-
Tap Show as QR-Code
-
Hold the QR code in front of the scanner
Personal data
Personal Data must be turned on. The check-in needs the member's name and email.